
AA: Intelligent Document Processing with IQ Bots
IQ is overrated.
You don’t need a sky high IQ to become successful, or to lead a deeply fulfilling life, but if you want to process documents using RPA then forget whatever you have just read so far.
Why Can’t “Normal” Bots Process Documents?
Nobody said Task Bots can’t process documents.
It just isn’t intelligent enough to process semi-structured or unstructured documents.
Documents are Documents. What is all this talk about semi-structured and unstructured?
Not quite.
Documents aren’t always “organized as expected”, and it isn’t anyone’s fault either.
Now to explain the phrase in quotations – yes, documents are always organized, otherwise we wouldn’t call them documents.
What you have to understand here is that documents are organized in a way that only you and I can understand
It’s difficult, if not impossible, for a software to pick up on the patterns, unless you train the bot to detect those patterns first.
Take Purchase orders for example, I might purchase 10 boxes of screws today whose details will fit into a single page, but what if I purchase 100 boxes of screws tomorrow?

A single page won’t contain all that data, and it will spill off into a page or two or more.
This example is being cited just to give you an idea of what Task Bots are capable of, and what they aren’t.
Now to answer your question, I lightly touched on it.
You can process documents by cementing the pattern into a logic the bot can pick up on, such as providing pointers like regex, but that applies only so far as the documents are simple and structured, however the same cannot be said for documents where the elements vary in position, size, or documents which contain tables.
You need to meddle in a bit of machine learning for the bot to process documents of that nature, but lucky for us, the team over at Automation Anywhere did most of the heavy lifting for us.
We don’t have to crack our heads open trying to develop our own Machine Learning Models.
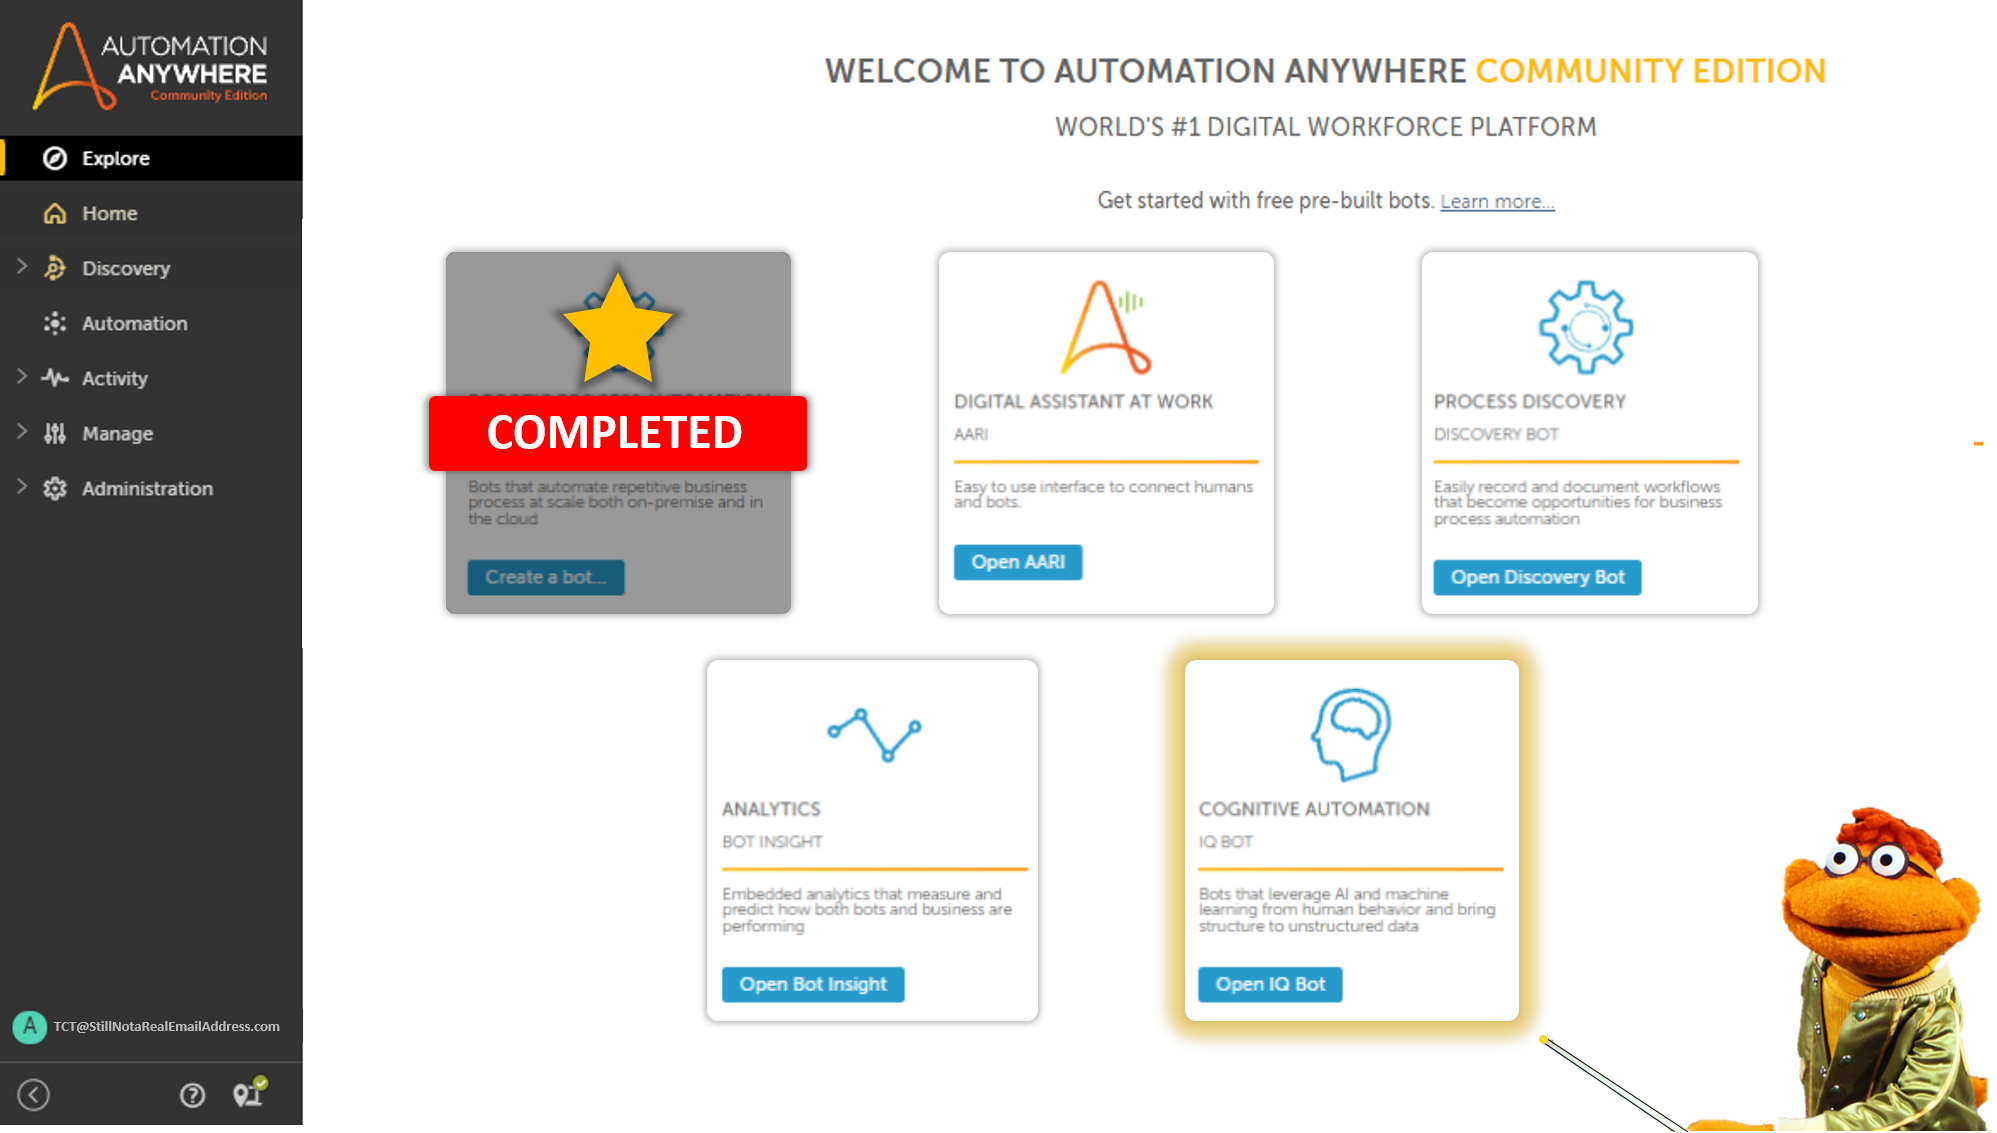
We just have to know how navigate across the interface provided to us, and that interface is called IQ Bots.
Interface? Isn’t it a “Bot”?
Not exactly.
Unlike Task Bots, when you develop an IQ Bot, you aren’t designing them from scratch.
You simply have to specify the documents you wish to work with, what items to extract, and rectify errors when the machine learning model fails to detect the data it was supposed to.
There is a lot to get into here, and I might have to convert this into a series as well, not because I want to populate my blog with more articles so that Google will bring my site to the promised land…
But to convert it into digestible segments for you.
No one is going to sit through a 3000+ word article, especially when its drenched in technical concepts.
That is why I keep my posts short and simple, except for this one.
There was too much to cover, and splitting the basics didn’t make any sense, so I managed to shorten it to a 2000-ish article.

Create a Learning Instance
Before we can train our IQ Bot, we have to first create a space for it to operate in.
This space is called Learning Instance.
But…where can I create a Learning Instance?
It’s found under Manage.
Once you head over to the IQ Bots portal, you will be faced with two options.

If you have never created a learning instance before, or if you are trying to train documents you haven’t trained before, then click on Train Other Documents.
I know, I know.
We were supposed to create a learning instance, but if we hit create here, it will only create a learning instance for the document types we have uploaded before.
Not that easy to wrap your head around I know, but it gets easier with practice.
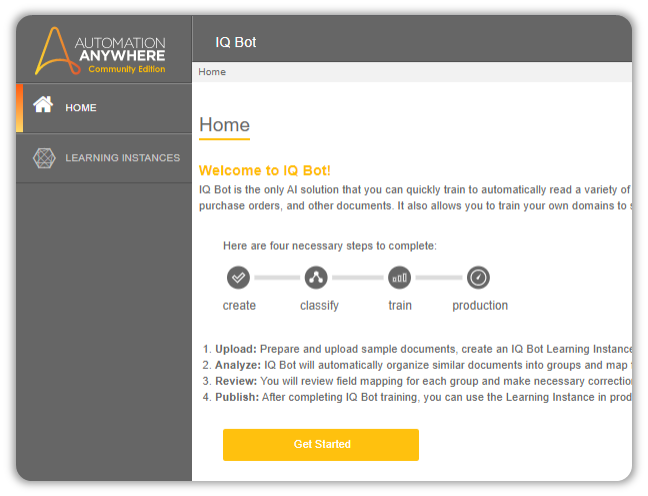
Once you click on Train Other Documents, it will open up a new tab which redirects you to the actual IQ Bot page.
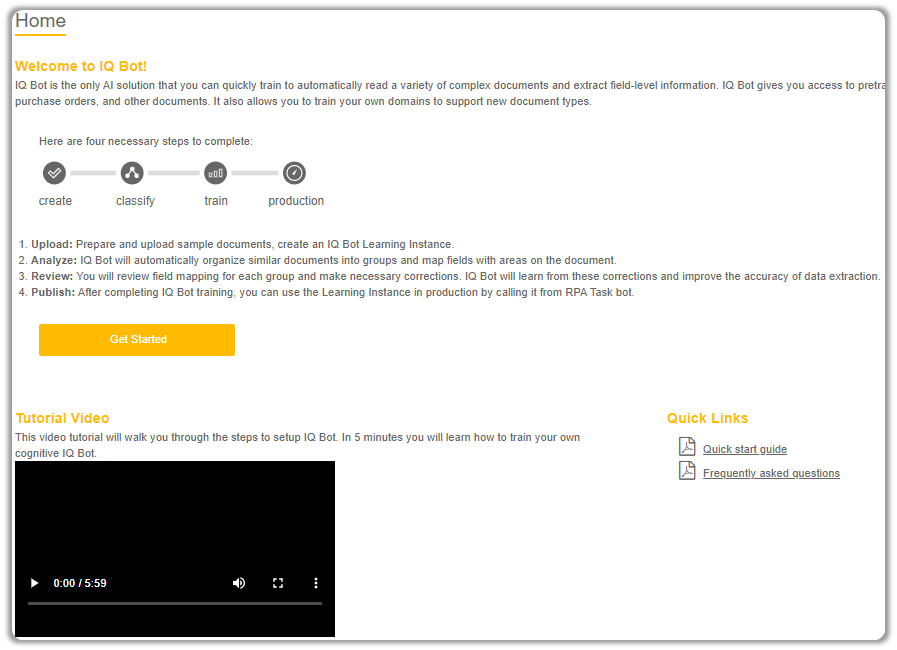
Once the page loads, you can read through the information present there, and also watch the 6 minute tutorial below to get an idea of what we can achieve with IQ Bots.
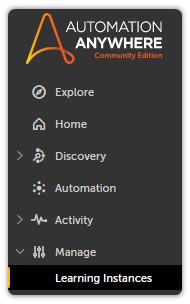
Click on Learning Instances on the toolbar present towards the left.

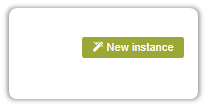
Next, click on New Instance.
Now for the fun part.
Provide a suitable Instance Name for your learning instance.

Next, select the Document Type you want to train the IQ Bot to process.
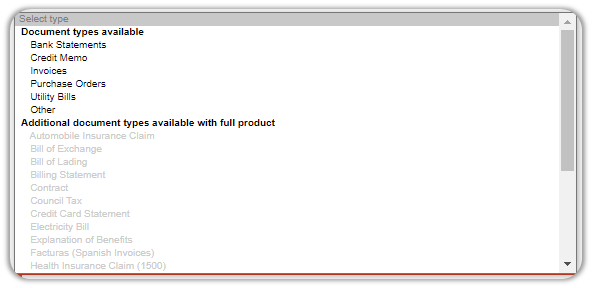
Before performing this step, download Sample Documents by clicking on the button shown in the next screenshot.
Go through the sample documents and choose which document you would like to work with before selecting the Document Type.
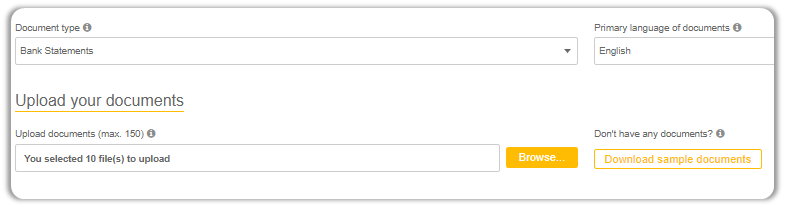
Next, upload the documents.
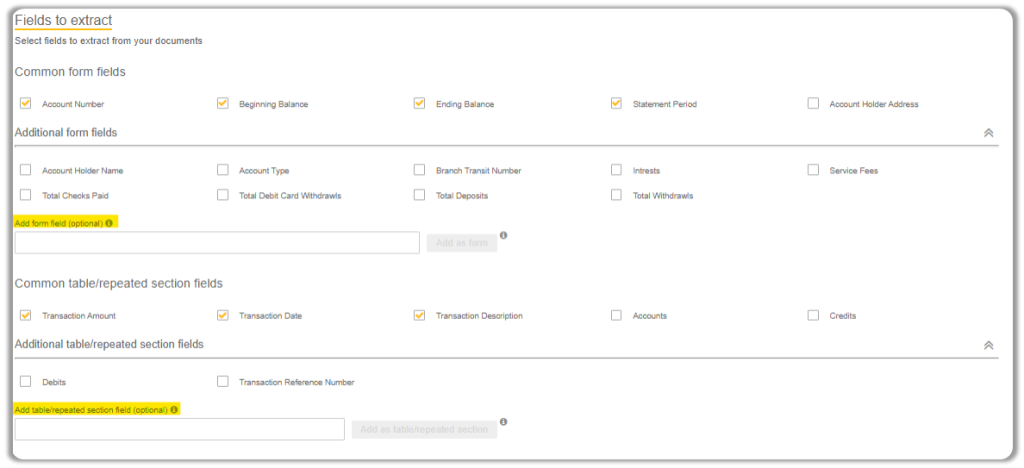
We will now define the fields our IQ Bot will to extract, but before that you have to understand in what all ways those fields can organized.
Fields are either standalone, or arranged inside tables.
The fields that exist outside of tables are termed as Form Fields, and the ones arranged within tables are termed as Table Sections.
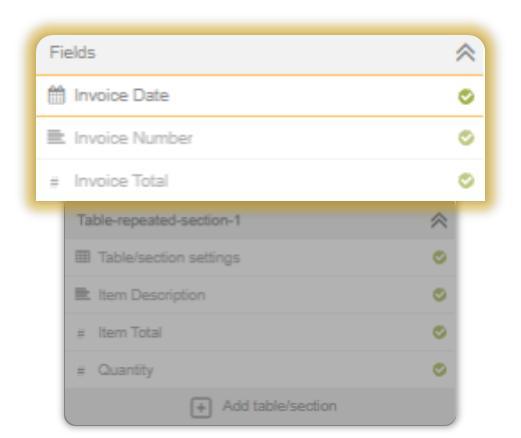
You can pick and choose or add in fields that you wish to extract from your documents.
If you selected a Document Type, you will notice that a handful of fields have been preselected. If you choose Other, you’d have to enter your own fields.
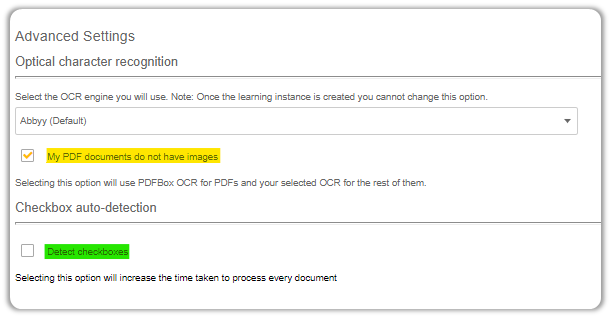
Next you have to select the OCR you wish to work with.
Abbey is selected by default in Community Edition and you can select another engine from the dropdown shown below.

Also, if your image does contain images, you have to uncheck the box because it will be checked by default
Finally, we have the Checkbox auto-detection which should only be checked when your documents have checkboxes.
It’s a little redundant to say that. Just trying to make conversation here.
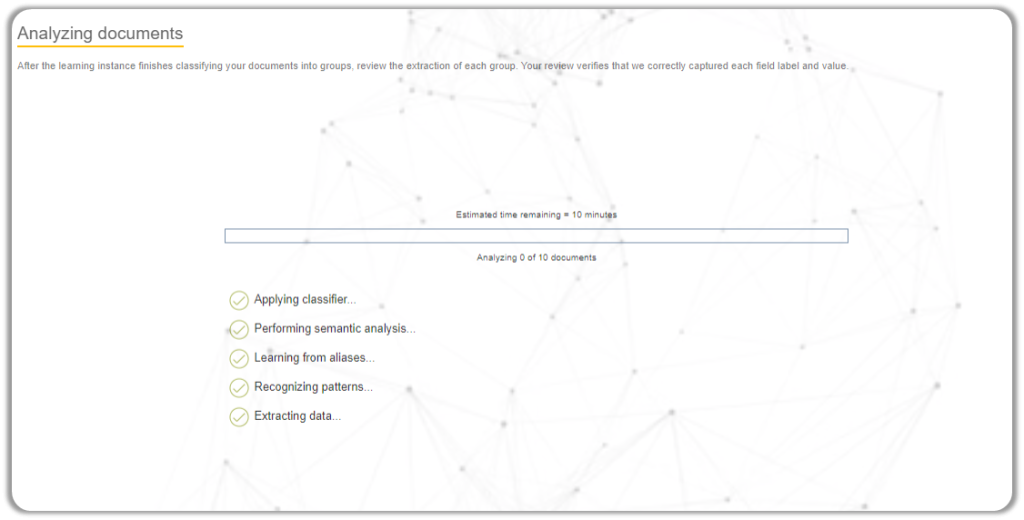
Click next and now our IQ Bot portal will start to analyse and classify the documents.
Wait a Second, WAAAIT!
What?
I wasn’t Paying Attention and got Logged out, What will I Do?!
Chill.
Just log back in and head back over to your Learning Instance.
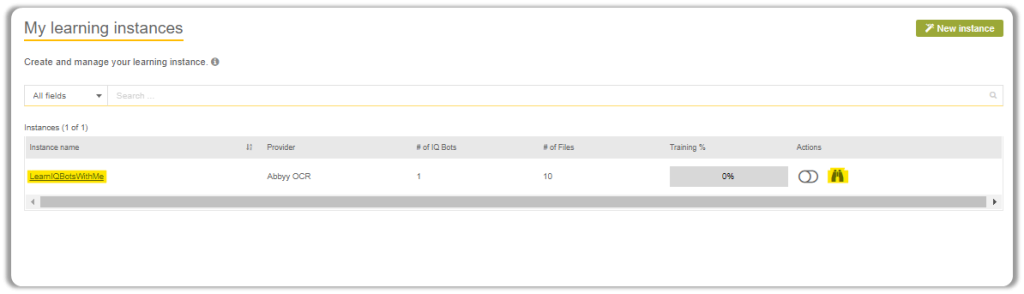
After the page loads, click on the Instance Name or Binoculars Icon highlighted below and it will redirect you back to the portal you were working in.
Now yo-
I Haven’t Seen Any This Before! I DON’T RECOGNIZE ANYTHING!
Chillax.
You just have to click on Edit Bot highlighted in yellow.
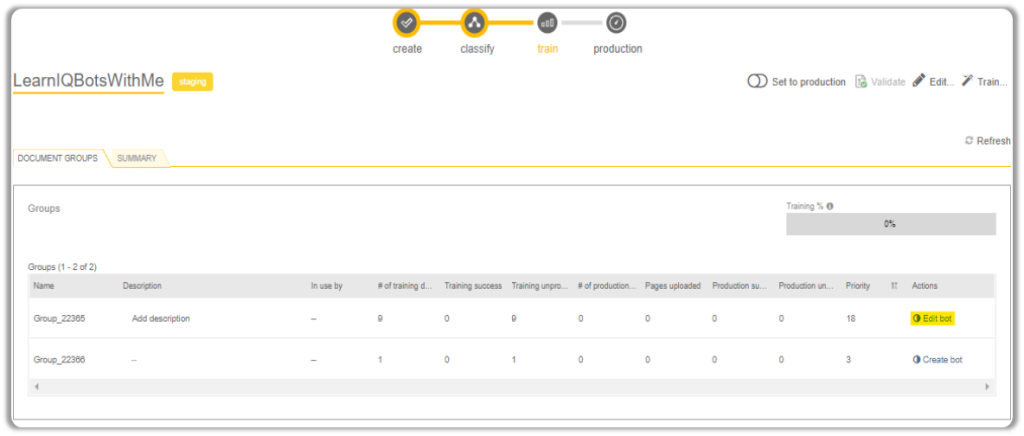
The IQ Bot automatically classifies documents into separate groups depending upon differences in template or the threshold you provide for each group.
I Got Logged Out Again! Why Does This Keep Happening?!
Ugh.
Moving on.
Training the IQ Bot
The next few steps requires your complete attention.
We have breached the thousand-word mark long back, but if I split this now, you won’t pay attention.
Put that phone aside and focus on what you are about to read, because it is crucial that you understand this.
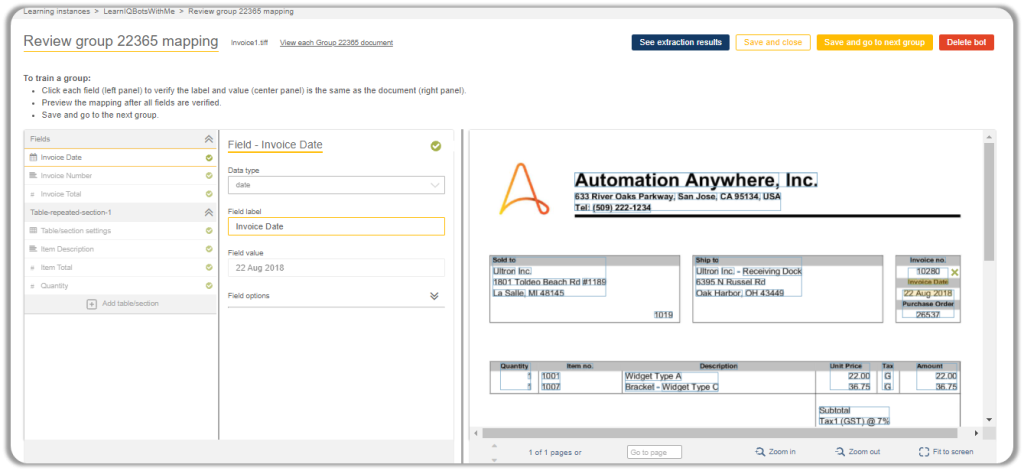
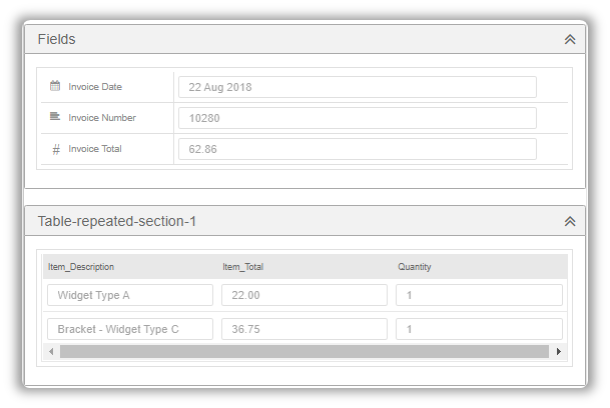
Once the page loads, you will see the document properties on the right which contains all the Form Fields and Table sections we had defined which creating our Learning Instance.
The IQ Bot was intelligent enough to map the items for us, but are you intelligent enough to map them on your own?
What if the Bot wasn’t intelligent enough to map them?
Lets see how thats done.
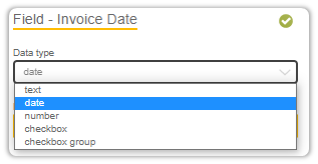
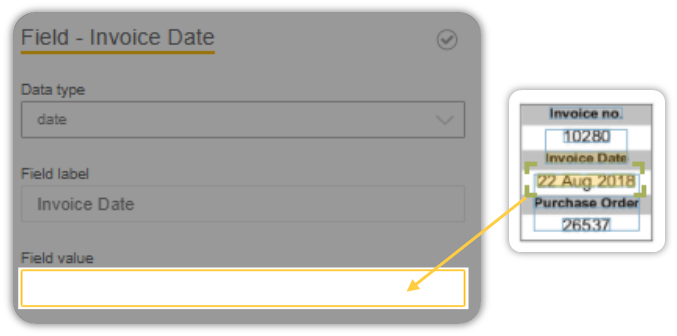
We will map the Invoice Date first.
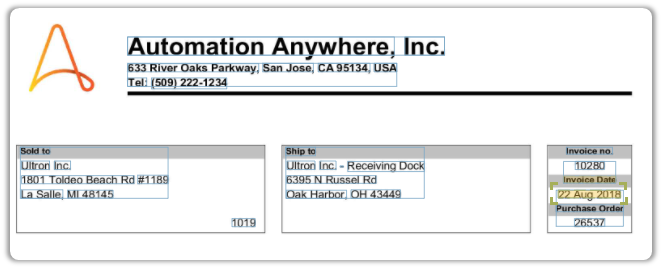
To do so, first assign the data type that it ought to assume.
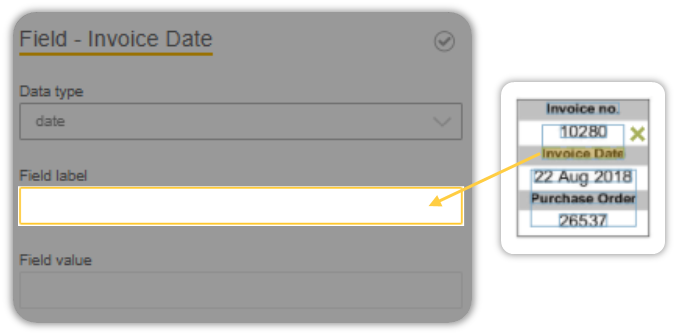
The Field Label behaves as an anchor with which the IQ Bot detects the value it should extract.
Click on the Field Label on the properties panel to activate it so that when you map the value it gets tagged to that particular field. You will know when you have selected the field once the field borders turn orange.
Next, click on the Title on the document that you believe would behave as an appropriate anchor for the value you are trying to extract.
As a tip, select the item closest to the item you are trying to extract.
Don’t do what I did and select the Title as anchor.
Next, we will map the item we are interested in.
The process is same, so go ahead and map that as well!
And thats about it for Form Fields.
Lets see how Table Fields are mapped.
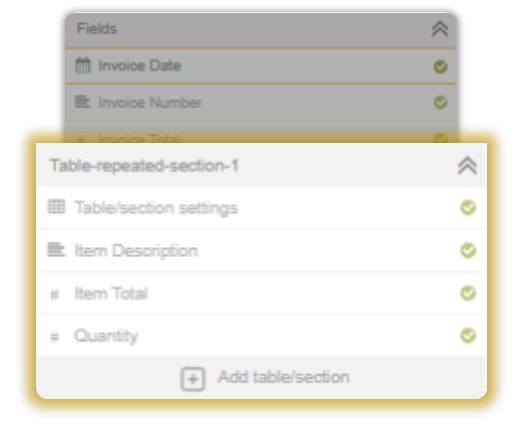
Mapping Table Repeated Sections
I bet you must be wondering, ‘What is up with that fancy sounding name? Won’t ‘Table’ suffice?”
There can be multiple tables on a given document, maybe a massive table that decided to spill off into separate tables, but are one and the same.
Table Repeated Sections allow us to link those tables together, into the whole they once were.

Would have been nice if we could develop a solution to help us realize that.
We won’t be exploring that segment here, as that would lengthen this article.
Lets look at a simple example, then move onto the advanced stuff in another article.
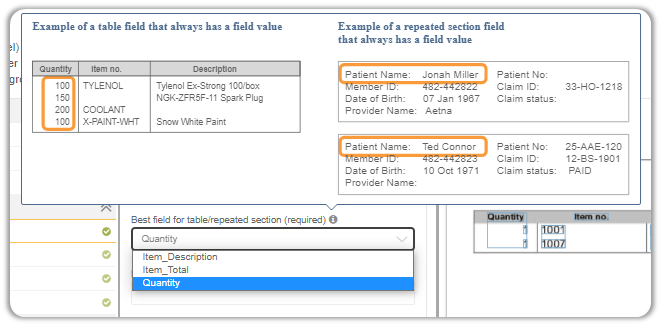
Before we can map our columns, we have to first select one column which will serve as a good indicator of the table’s length. The column you select must contain values in all rows for e.g., a column which contains the serial numbers or quantity fits the criteria.
You can also hover above the ? icon to get a better understanding of what this particular field is trying to get from you.
Also pay attention to the element highlighted in green in the previous screenshot.
This will go into the End of Table Section Field. Its optional, so you don’t really have to provide it.
The two fields we just entered now establishes the boundaries that our table resides in. The IQ Bot will extract structured data present between the two fields.
The Advanced Table Options and Logic feature will be discussed in another article.

Now we can map our columns like we did with the Labels in form fields, but the mapping of fields is a little different.
You are not supposed to map each and every row, instead you simply have to click and drag the mapping onto the header or on the first column value itself like so:
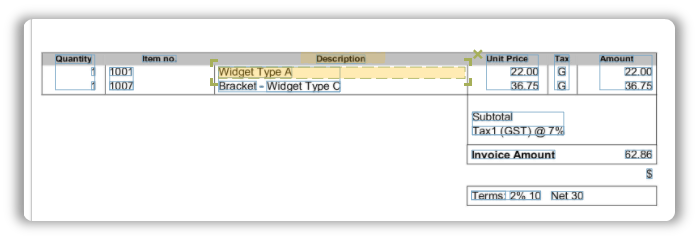
The mapping is lengthened sideways to accommodate data. Perform the same mapping for other columns as well.
I usually map the headers, so its up to you. See what works and implement the solution you like.
Once you have mapped all the items, you can now view your extraction results before moving onto the next group.
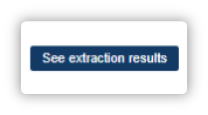
This will open up into a new tab and you will see the results of your mapping, which you can also export to csv if needed.
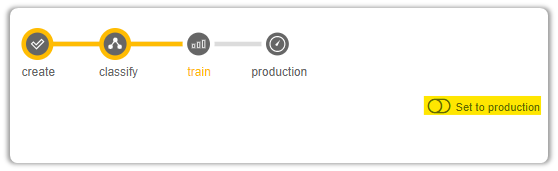
If you are happy with the extraction, you can save and go to the next group and perform the same steps there.

Once all the groups have been mapped, you can now set it to production.
And with that, you have created your first IQ Bot!
There is a lot more to dig into, which is why I have decided to stop here.
Custom Logic, Domains, Repeated Table Sections, line items spill off, Validator etc, all will be addressed in another article.
See you then.