
AA: I’m New To Automation Anywhere, Help ME!
If you are new to Automation Anywhere chances are you might have performed a quick google search and probably watched a couple of YouTube Videos here and there, before heading over to the Community Edition that you just requested access for.
You log in and are greeted with…
Well you are greeted with information overload.
This is how newbies feel when they enter the Control Room for the first time, thinking RPA is simply Click and Drag, only to be greeted by complexities sandwiched upon complexities.
But you need not worry, since I’m here to guide you.
Logging In For The First Time
Since this is an introduction, I won’t throw everything Automation Anywhere as to offer at you. Let’s keep it simple and slowly inch our way into the citadel.
When you sign up for a Community or Enterprise Trial, you will be greeted by a mail from Automation Anywhere containing the Cloud URL, Username and Password.
The Username will be the email you registered with, while the Password is auto generated and temporary. You have to change the password when you log in for the first time.
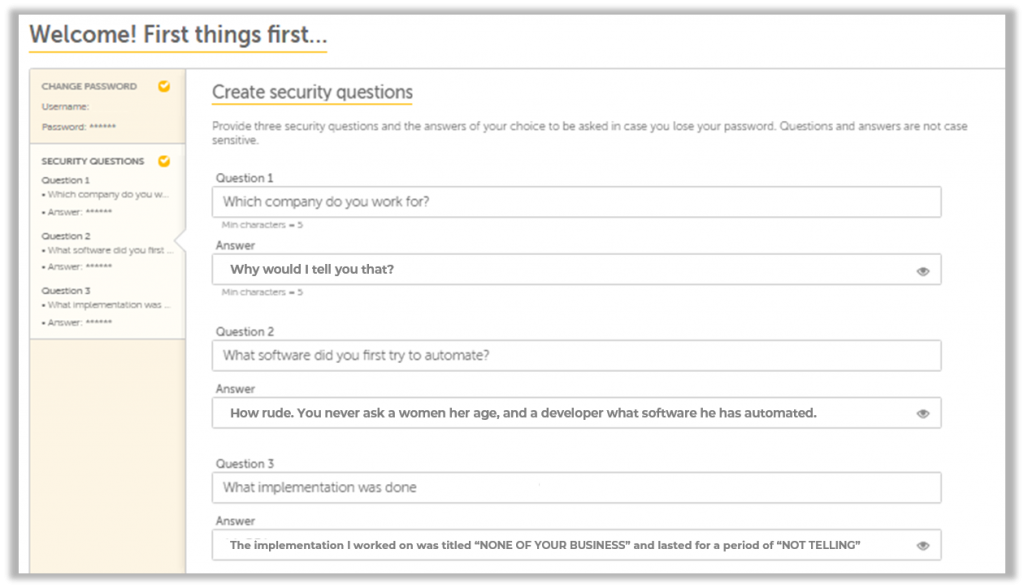
Also, you will have to set up three security questions. Make sure you don’t do what I did and provide random answers to random questions. This page also shows up in the Enterprise Edition.
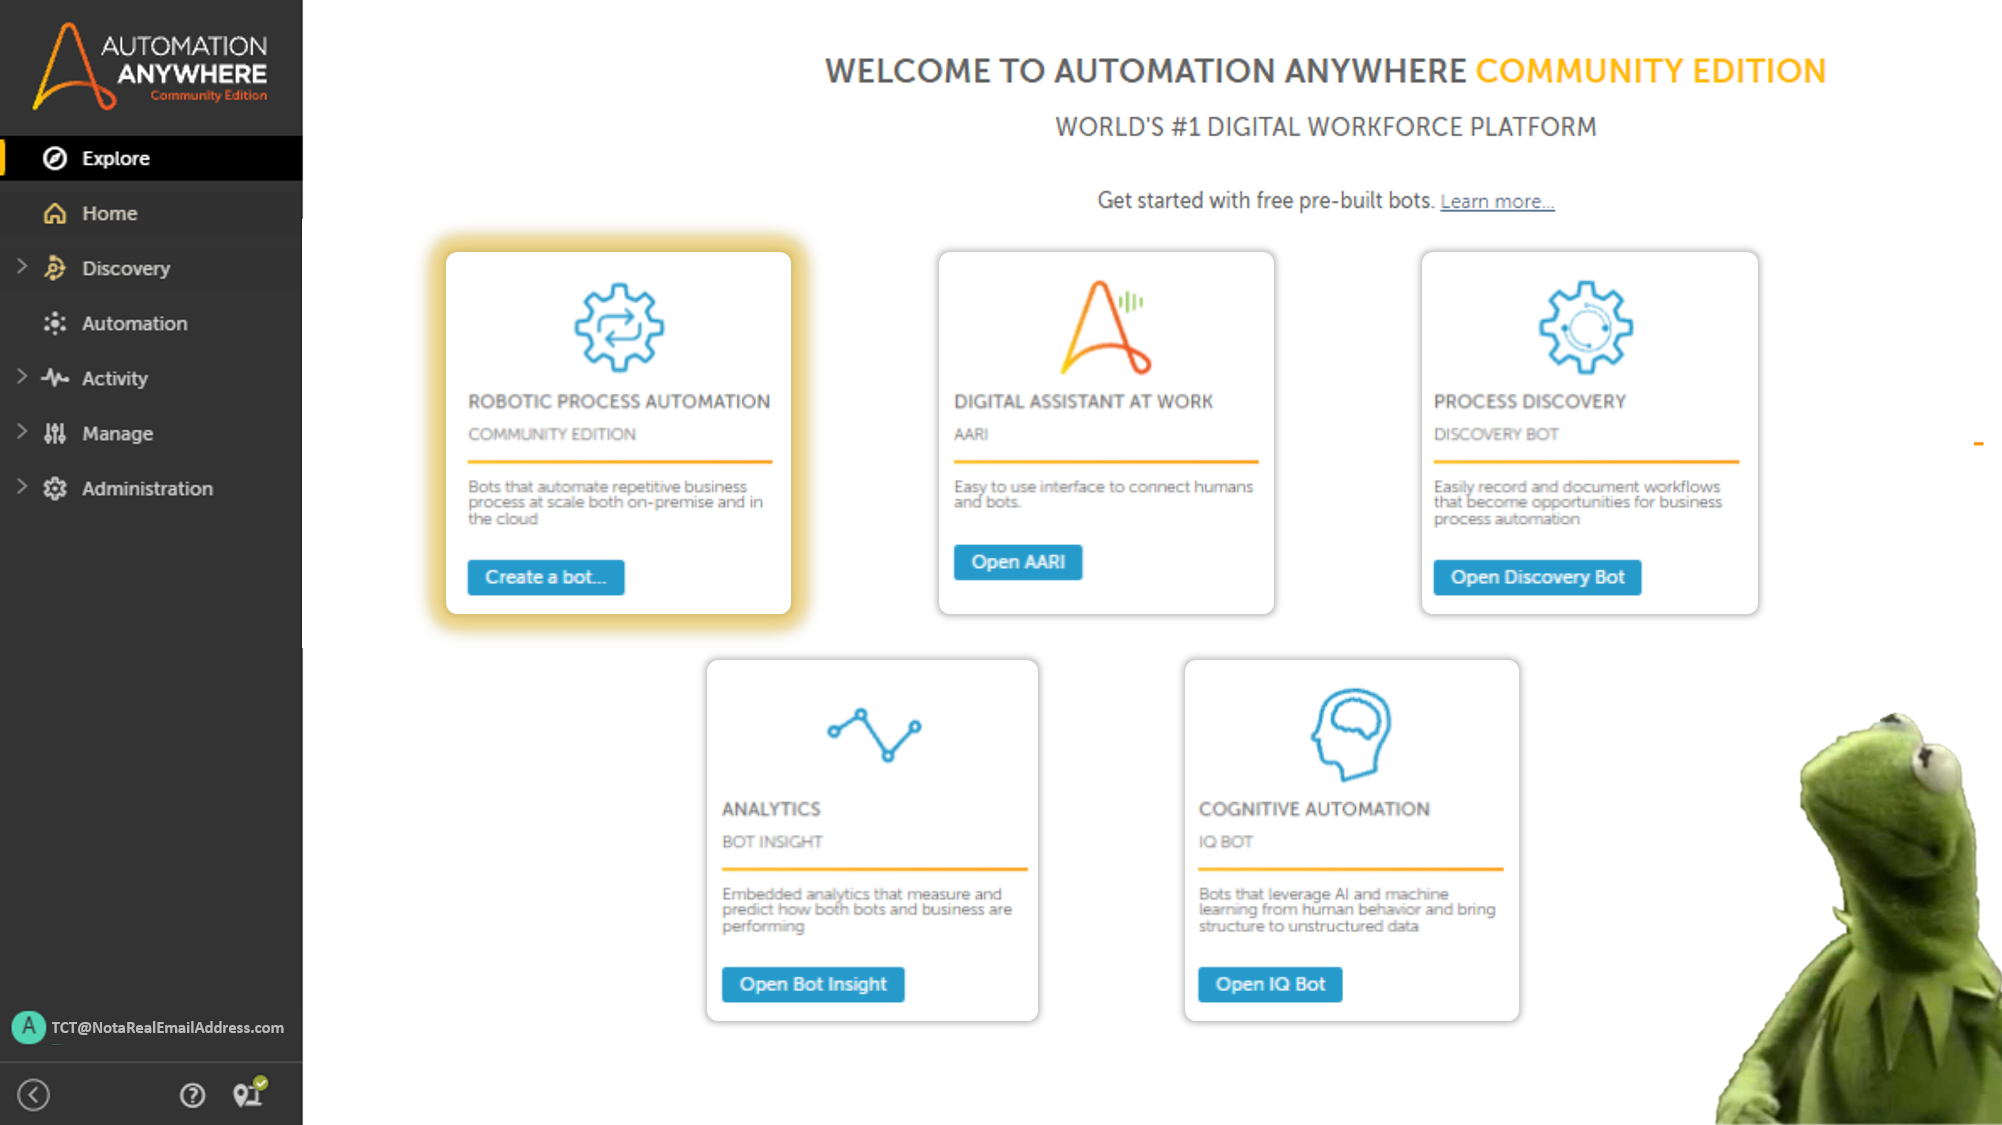
Once the initial setup is complete, you can head over to the Automations Tab where you can finally start developing your very own automations!
Unlike coding, you aren’t staring at a black screen, hoping nothing unexpected pops out in front of you.
With Automation Anywhere, the view is much more refined and easier on the eye. The team over at Automation Anywhere have been working day and night to make it easier for us to develop and test automations.
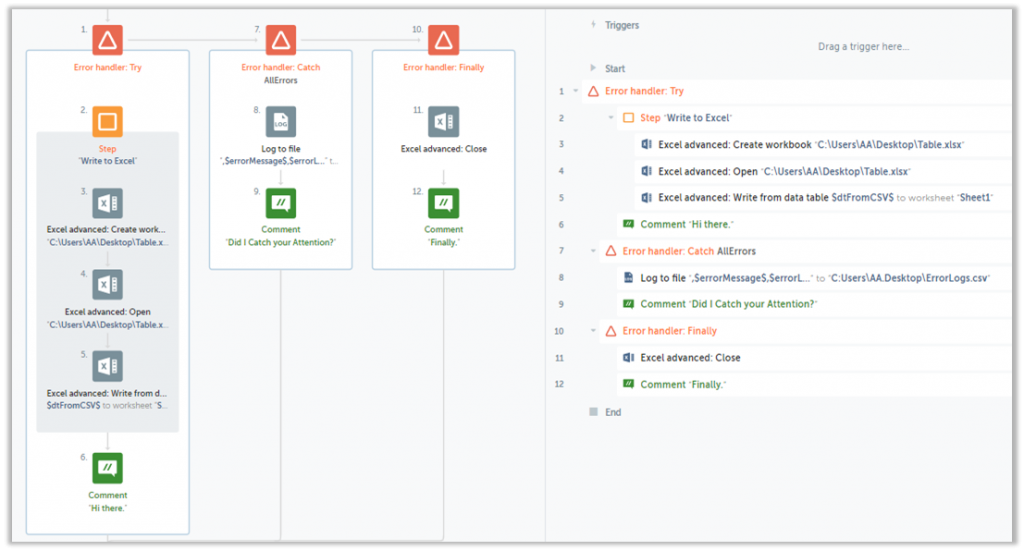
I have included few screenshots of the RPA Workspace that we will shortly head into:
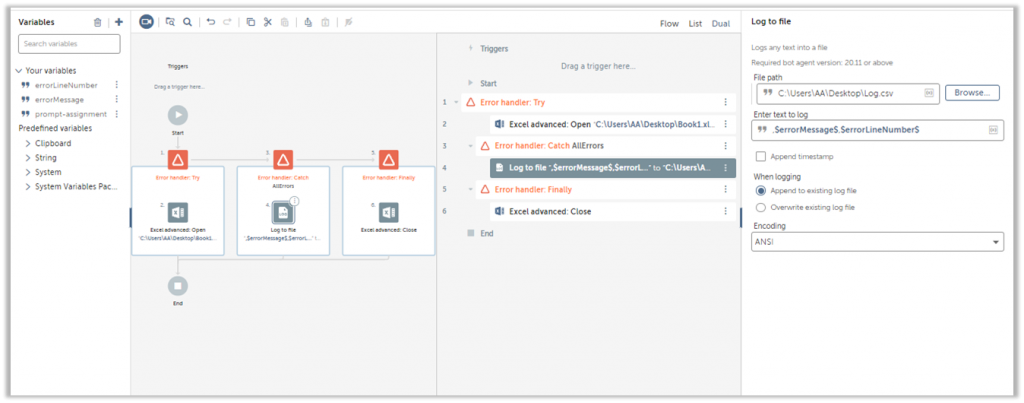
Yes, it’s a lot to take in at first, but that is because I’ve enabled all views.
You can toggle between three views, namely Flow, List and Dual.
Now that we are done gawking at the UI, let’s gawk at one more features before developing our first bot!
“Search” For What?
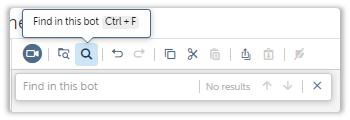
Automation Anywhere recently introduced a search feature into A360, which was already available on V11. Not really sure why they didn’t release it earlier. I struggled with finding those pesky error prone actions, and all I could use at the time was the browser’s Ctrl+F.
Don’t get me wrong, Ctrl+F works, only if the item is present on the visible screen. You know what else behaves like that?

Yeah, it wasn’t much help, so this new and much needed release was much needed indeed.
Now Ctrl+F invokes Automation Anywhere’s inbuilt search feature, which is pretty neat.
Now to answer the question phrased as a title,
When you develop automations, there will be hundreds upon hundreds of lines of actions you will have to work through and put together.
But development is not limited to mashing things together, pushing it to production in record time and hope it works, now is it? What, don’t look at me like that!

We have to test it to ensure everything works as it should, even when it is put into situations where it can crash.
It’s your job as the developer to ensure that the bot never crashes.
But you’re not there yet.
You are just exploring now!
Also I have a tendency to go off tangents. Forgive me.

To conclude on this topic, the search feature helps us narrow into the action(s) that we either wish to test, refine, replace.
Instead of scrolling through the entire process, you can now rely on the search feature instead.
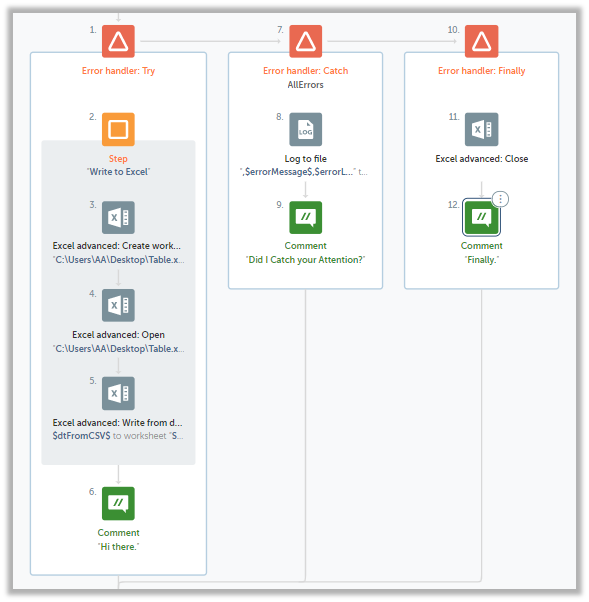
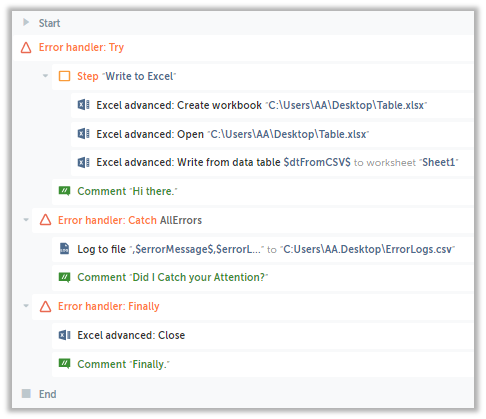
You can also make your life easier once you learn to use the Log To File Action the way it should be.
You might have stumbled upon this article of mine where I described how you can create a fantastic looking log file both you and the end user will be comfortable working with, and decided “Hey! I’ll log my data to csv from now on!”.
Now For Your First Automation Anywhere Bot!
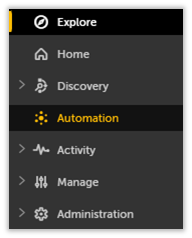
First, head over to Automations.
Next, click on the icon highlighted in the screenshot below:
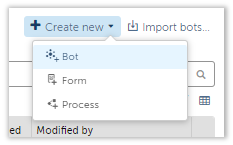
Press Bot.
We will look at Form and Process in another article.
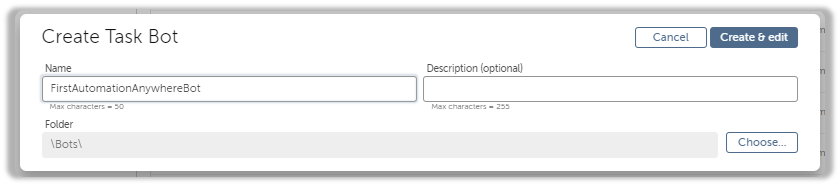
A window will pop up, now provide a suitable name without special characters.
Automation Anywhere doesn’t like it when you add special characters to names.
Now, head over to the Actions panel on the left and type in Message Box.
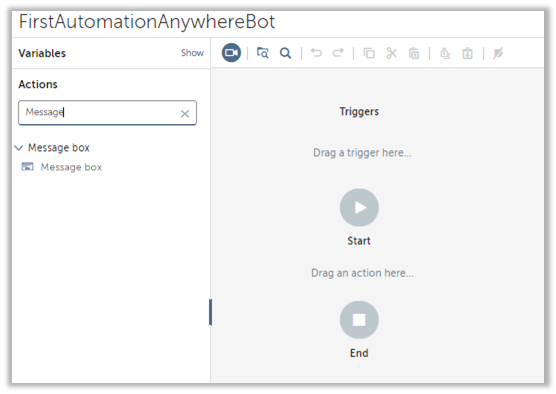
You can either Double click or Drag it into the Workspace(in grey, towards the right with the Start and End icons).
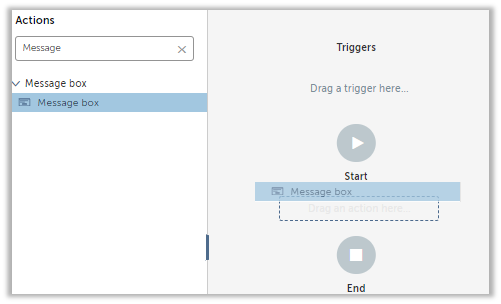
Message boxes can’t exist on their own without any inputs, so lets provide it with some food to stave off its hunger.
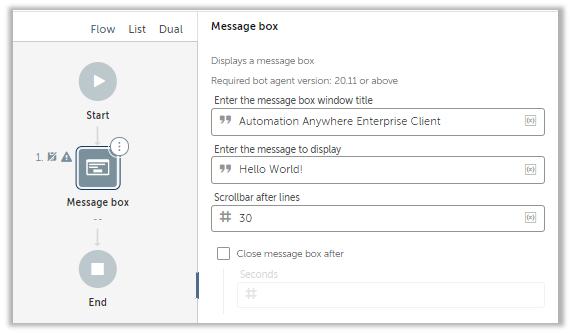
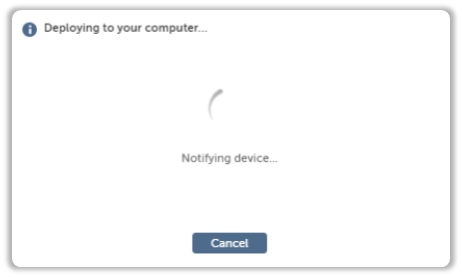
Now all that is left is to hit Save and Run!
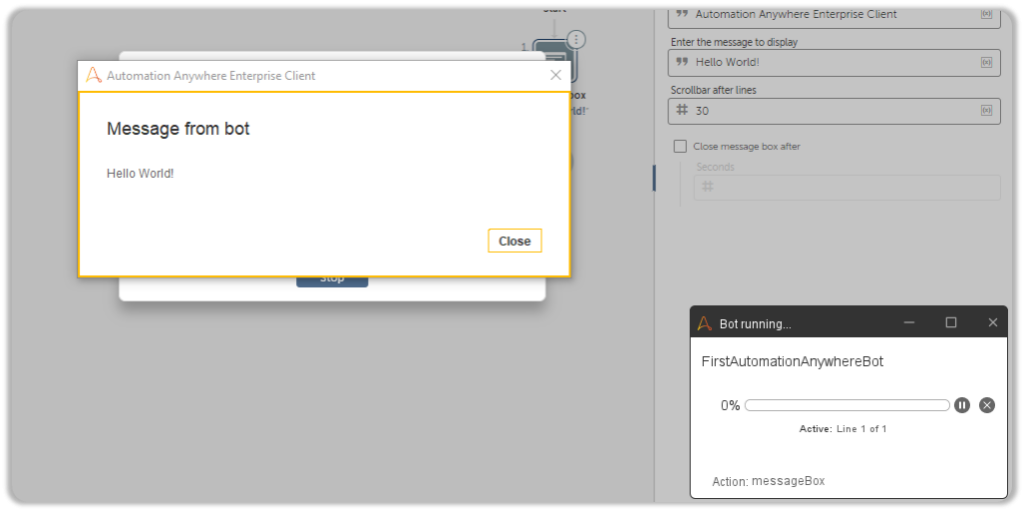
And there you have it, your very first automation was successfully executed!
Of course, your clients aren’t investing a fortune into RPA simply to display a stream of “Hello Worlds”, but you have to start somewhere, right?